We’ve all been there. You open your dresser, and it’s overflowing with t-shirts—race shirts, event tees, or “unisex” shirts that are really just bulky men’s sizes. They sit there, taking up space, because while you love the design or the memory, the fit is, frankly, unflattering. It’s too tight in the sleeves, too boxy in the torso, or just too hot for a 2026 summer.
At YayCusto, we’re all about making apparel work for you. If a shirt isn’t getting any love, it’s time for a transformation. Turning a t-shirt into a tank top is one of the easiest DIY projects you can tackle. There is no sewing required, it takes about 15 minutes, and it immediately turns a “meh” shirt into your favorite gym or beach staple.
In this guide, we’ll walk you through the professional way to cut a shirt into a racerback tank top, ensuring you don’t ruin your favorite graphics while achieving a clean, retail-ready finish.
Why Upcycle T-shirt Into Tank Top? The 2026 Perspective
Beyond just looking good, upcycling is a necessity. Recent statistics from environmental agencies show that nearly 85% of all textiles produced annually end up in landfills. By taking 15 minutes to learn how to turn a t-shirt into a tank top, you are extending the lifecycle of your garment and reducing your personal carbon footprint.
The Benefits of the Cut:
- Greater range of motion: Integral for gym workouts, overhead presses, and yoga.
- Ventilation: Cutting out about 1/3 of the fabric makes the garment cooler and better ventilated for high-heat environments.
- Show off your style: These tanks are perfect for showing off patterned or designed sports bras that deserve to be seen.
- Comfortable Fit: It remains loose around the torso, offering a “flowy” feel that is perfect for days when you want coverage without restriction.
Preparation — Tools and Materials
Before you start cutting, gather these essentials. Using the right tools is the difference between a “hack job” and a YayCusto masterpiece.
- A T-Shirt: Ideally 100% cotton or a cotton-poly blend. Avoid heavy 100% polyester “dry-fit” shirts for this specific no-sew method, as they tend to fray more than they roll.
- Fabric Scissors: Please, do not use kitchen or paper scissors. You need a sharp, dedicated fabric blade to ensure the edges are smooth and don’t “chew” the cloth.
- A Washable Marker: Tailor’s chalk is great, but a simple washable marker or even a pen works fine.
- A Stencil: Grab your favorite sports bra or an existing racerback tank top to trace the back shape.
Step-by-Step — The Professional Process
Step 1: The Flat Lay

Lay your shirt flat on the ground or a large table. Smooth it out completely, lining up the side seams and the shoulder seams. The flatter the shirt, the more accurate your cuts will be.
Step 2: Marking the Reference Points
Using your ruler, mark 2 inches from the neck seam on the shoulder on both sides. This keeps the collar ring intact, which provides structural support. Next, mark 2 inches below the armpit seam on both sides. If you want a more “open” tank that shows more of your rib cage, you can go lower than 2 inches.
Step 3: The First Armhole Cut

Start at the bottom mark you made under the sleeve. Use your scissors to follow the natural curve of the sleeve seam, aiming for the mark you made at the neck. Try to cut in one smooth motion.
Step 4: Ensuring Symmetry

Fold your t-shirt in half vertically, lining up the neck seams. This allows you to trace your first cut onto the other side, making an identical cut. This is the secret to a professional-looking DIY tank. Do not throw away the sleeves yet—you will need them for the back tie.
Step 5: The Racerback Stencil

Flip your shirt over so the back is facing you. Grab a sports bra with a wide racerback strap or another racerback tank. Line up the shoulders of the bra with the top of your new tank top. Use your marker to trace the “U” shape of the racerback.
Step 6: Cutting the Back Side Only

This is the most important rule: Only cut through the back layer of the shirt. Lift the back fabric up and away from the front so you don’t accidentally cut through your design or the front of the shirt.
Step 7: Creating the Fabric String

Take one of the sleeves you cut off earlier. Cut a strip of fabric about 0.5 to 1 inch wide. Cut the loop so you have one straight, long piece of fabric string. Give it a gentle pull; the cotton will curl into a cord.
Step 8: Bunching the Fabric

Grab the back of the tank between the shoulder blades and bunch it together at the spot where you want the “racerback” twist to begin.
Step 9: Winding the Tie

Tie your fabric string in a tight knot at the top of the bunched fabric. Begin winding the long piece of string around and down the bunched section. As you go, tuck the short end of the knot underneath the wrap to hide it.
Step 10: The Weave and Finish

Once you have wrapped the cord as far down as you’d like (usually 5–9 inches), tie another knot. Use your finger to weave and tuck the excess tail back into the twist. This prevents it from coming untied in the wash.
Some Pro Tips for Success When Turn T-shirt Into Tank Top
- The Stretch Test: After you finish your cuts, give the raw edges a firm tug. This encourages the cotton to roll inward, hiding any minor imperfections from your scissors and creating a finished “hem” look.
- The First Wash: These tanks actually get better with age. The cuts get softer after a wash, and the inward roll becomes more permanent.
- Practice First: If you’re nervous, practice on an old, plain shirt before moving on to your favorite graphic tee.
- Length Adjustments: Since this is a no-sew project, feel free to cut the bottom cuff off if you want a cropped look or a raw-edge hem.
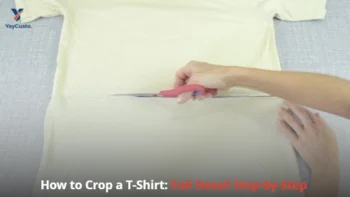
Read more: How to Crop a T-Shirt: Full Detail Step-by-Step
Conclusion: Wear Your Hard Work
Learning how to turn a t-shirt into a tank top is about reclaiming your wardrobe. It’s empowering to take a bulky, unused item and turn it into something that highlights your hard work in the gym or your unique personal style. At YayCusto, we believe that the best clothes aren’t just bought—they’re made to fit your life.
Your “new” tank top is now breathable, functional, and perfectly customized. You’ve gone from a dresser full of clutter to a wardrobe full of custom gear that is ready for year-round rotation.